Slit Lamp Examination - How to Use The Machine
A quick guide to using the Slit Lamp machine for non-optometrists and non-ophthalmologists.

Whilst optometrists are super great at it, when you only use a slit lamp every few months it’s kind of easy to forget how. Not to fear, here’s a super quick tutorial for when you need to examine an eye on such a fated ED shift but you’re no ophthalmologist.
This is a written adaptation of a great YouTube video by Anna Pickens, and to be honest credit should go to her.
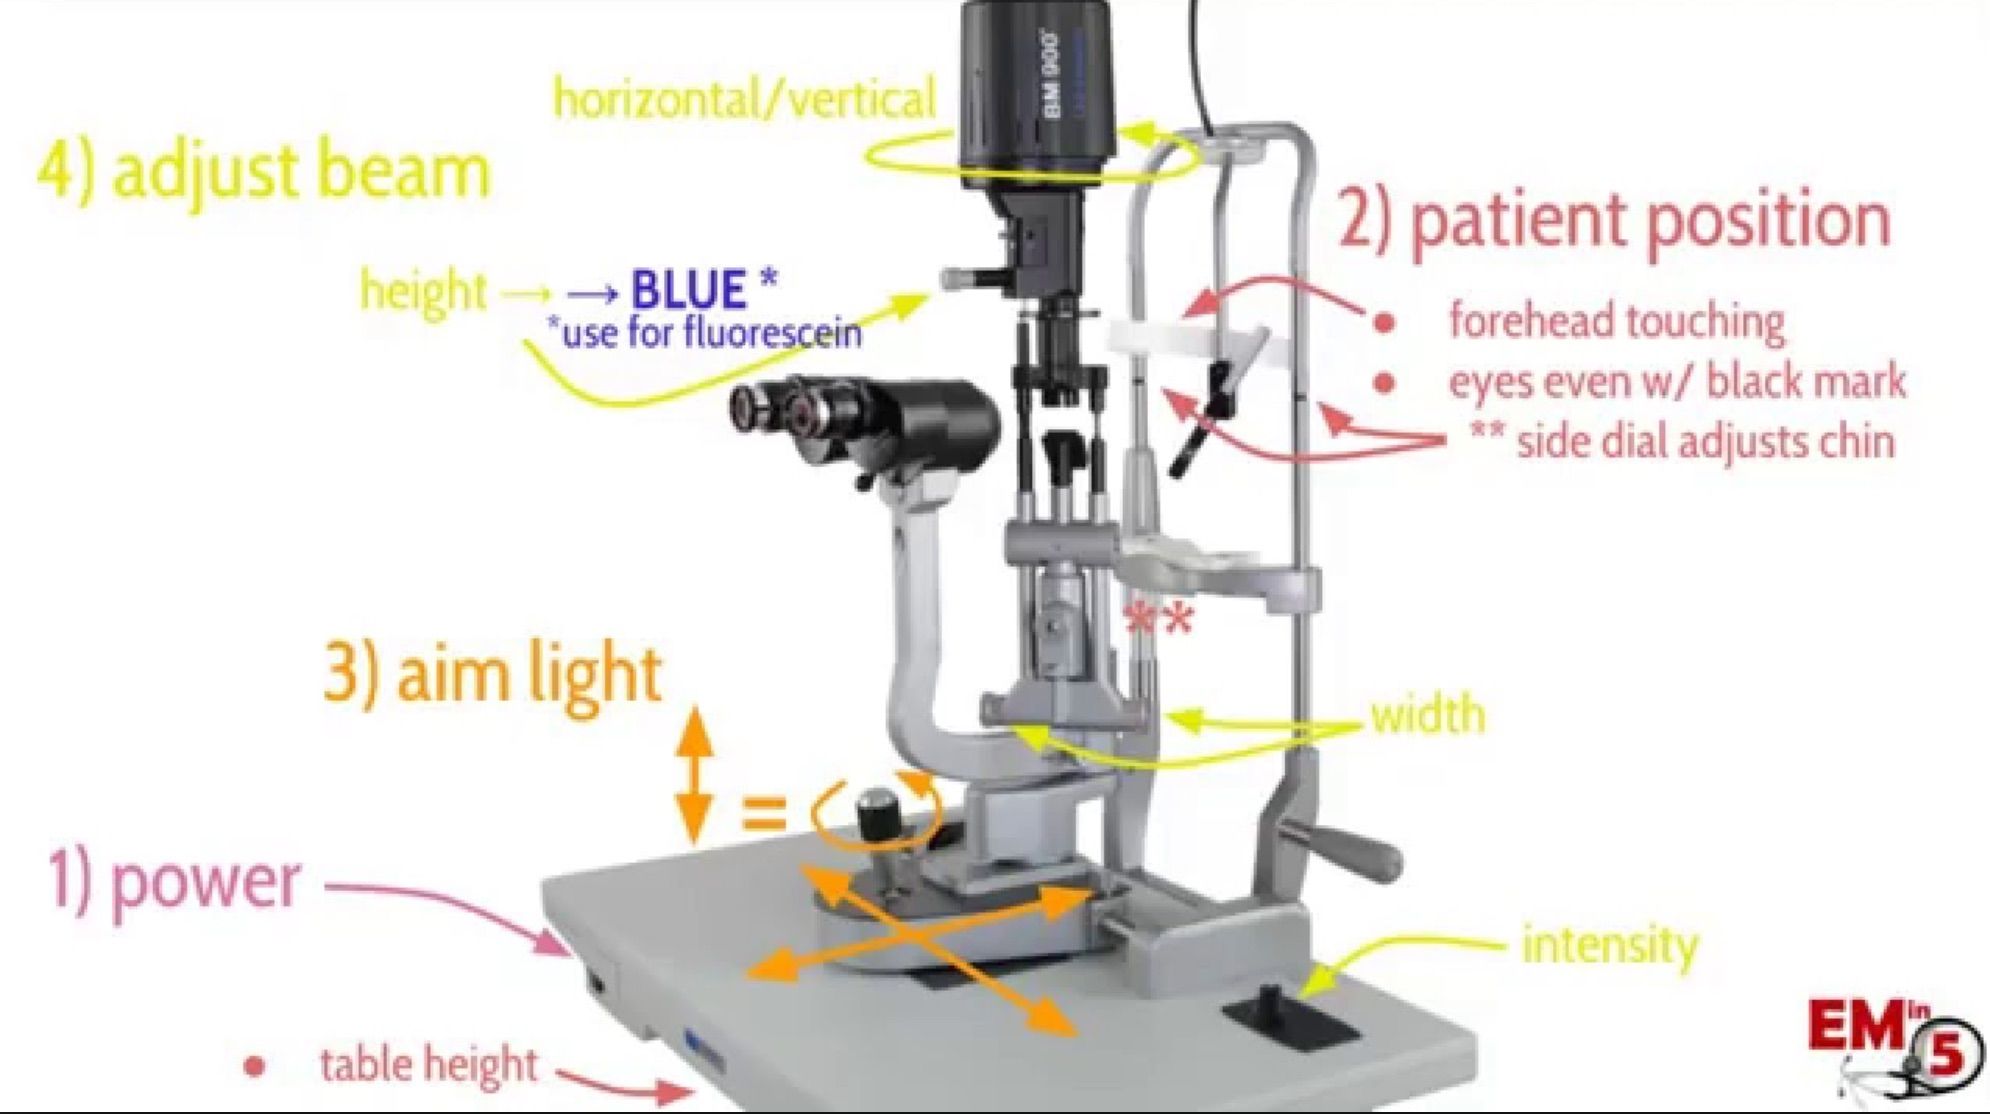
1. Power
Power button on the left hand side on the edge of the table.
The knob on the top right of the flat table allows you to adjust intensity.
Underneath the table is a button that you hold down and that then allows you to adjust height of table.
Prescription Calibration
At the binocular eyepiece, you’ll see numbers. Twist these to adjust to your prescription. If you’re wearing glasses or don’t need to adjust prescription, keep these both at 0.
2. Patient Position
As shown in picture.
3. Aim light
With the joystick (3), you can:
- jig it back in forth for subtle movements
- use the button on it for bigger movements(?) – Update: I've been informed that it's actually for taking photos in some workplaces!
- rotate it in order to move the slit of light up and down
You just jig joystick forward to see more posterior compartments.
4. Adjust beam
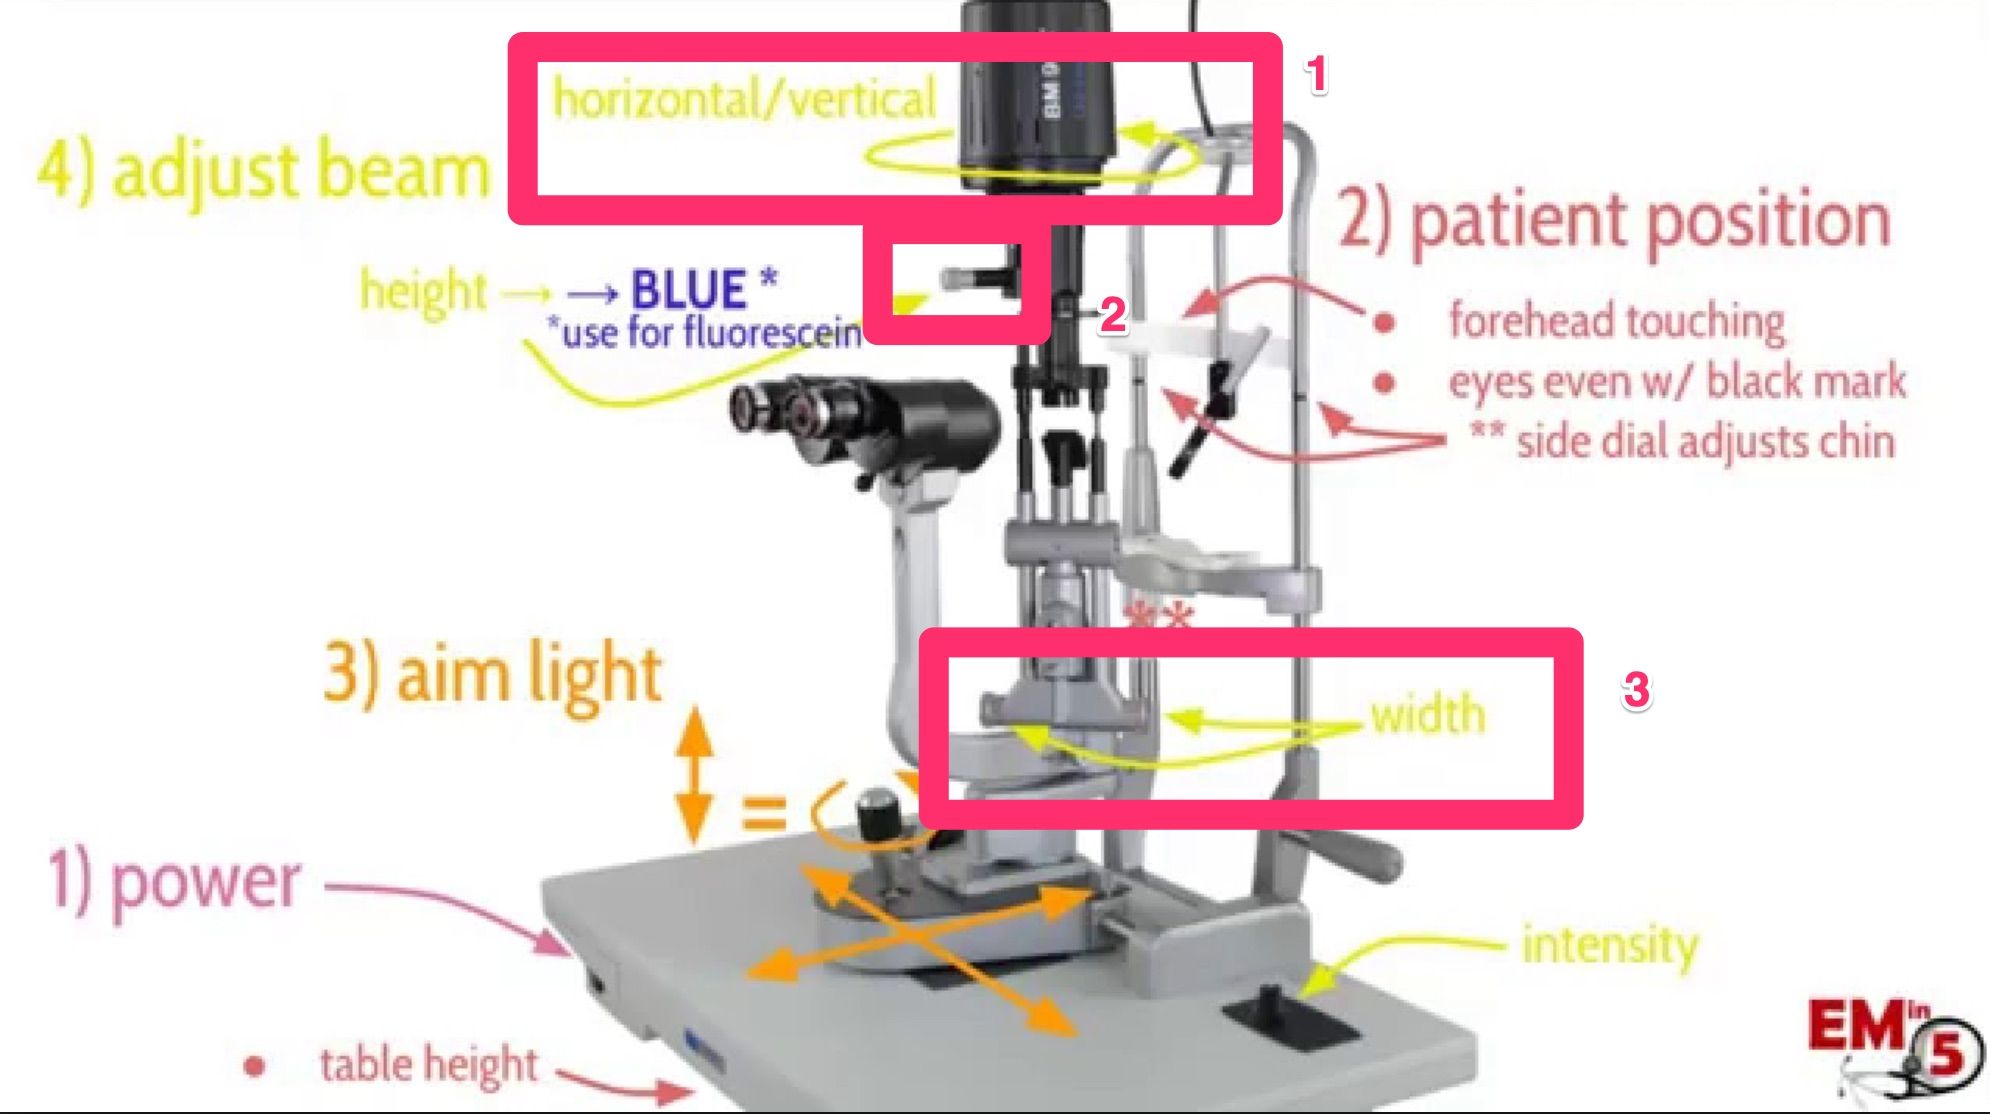
Knob at square 2 adjusts vertical height, but at its max is the blue light which you use for checking fluroscein staining.
Knob 3 for width of beam. Also has a green light which you SHOULD NOT use for fluroscein staining.
Square 1 is for changing beam from vertical to horizontal.
Notes on eye examination
- Use eversion of the eyelids with a cotton bud in order to look for foreign bodies.
- Use fluorosceine staining by touching the flurosceine strip to the inner of the lower eyelid.
- Use amethocaine or oxybuprocaine eye drops for anaesthetic.
- If taking pictures for ophthalmological referral, take a picture WITHOUT flurosceine and then WITH flurosceine.
- You’ll also be asked about pupil reactivity, shape, fluid leakage (e.g. globe puncture).
- If treating for corneal abrasion, use chlorsig ointment instead of the drops, which wash away really easily. The ointment can be rubbed in, it’s quite sticky, and you can then apply an eye patch to prevent further corneal damage IF you’re not worried about slight increases in intra-ocular pressure.